I was tasked with creating a custom Ubuntu AMI using Packer that has the following things installed: AWS CLI, SSM agent, and CloudWatch agent.
My first question I asked myself was, why? Why do we need to create a custom AMI when Amazon already has a long list of AMI’s in every flavor? Why couldn’t we just pick one that met our needs instead of creating a private AMI? Originally I assumed that the aim was to increase the security of instances, however upon further research, one of the main benefits of creating a custom AMI is speed. When creating your own AMI, you are able to essentially pre-load your code on the instance so when the instance boots up it is ready to go and you don’t have to wait the additional time to load your software.
Now we understand the “why”, let’s figure out the “how”. A core requirement of this task was to use Packer. Packer is a free and open source tool for creating images. When using Packer, you will follow a simple template that contains:
- Variables: This is where you can enter the “editable” features to make the AMI specific to your needs (i.e. AWS credentials, region, size of instance , VPC, platform, etc).
- Builders: This is where you will “build” your image, the variables will be pulled from the variable section along with some other features (i.e. tags, AMI filters, etc.) and your AMI begins to be created.
- Provisioners: This is where software is installed and configured within a running machine prior to that machine being turned into a static image. This is where I will install the AWS CLI, SSM agent, and CloudWatch agent.
There are a few pre-requisites that you want to ensure are installed on your IDE or local machine before you begin. First you will need to install Packer and you also want to make sure you have python, pip, and AWSCLI.
Let’s begin. First we will create the code, then I’ll explain how to run the commands. Since we are using Packer, we will fill in each of the 3 mentioned sections above.
Variables
Recall, this section of the code is where we will enter the information we plan to use to build the image. Should you ever want to create another custom AMI, the variables block should be the only place where you will need to change your code, the rest stays the same.
"variables": {
"ami_name": "<name your ami>",
"app_name": "<name your app>",
"aws_region": "<enter region>",
"build_number": "<number of instance you want>",
"instance_type": "<enter instance type>",
"platform": "ubuntu",
"subnet_id": "<enter subnet id",
"vpc_id": "<enter vpc id>",
"shared_account_ids": "<Enter account id>",
"aws_access_key": "{{env `AWS_ACCESS_KEY_ID`}}",
"aws_secret_key": "{{env `AWS_SECRET_ACCESS_KEY`}}",
"aws_session_token": "{{env `AWS_SESSION_TOKEN`}}"
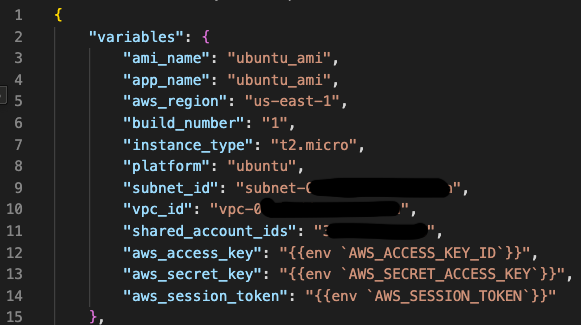
We don’t want to use our AWS credentials inside your script for security reasons, so in this situation I have opted to store my credentials as environmental variables instead. This can be done by running the command aws configure which allows for the creation of an AWS Credentials entry locally which can be referenced when running AWS CLI commands.
Builders
In this section, the specified variables along with a few other required elements will create the image. Take note of references to many of the variables we have already set: “{{user ‘<variable>’}}. Much of this section will not need to be edited for repeated future use as long as you plan to create an AMI with the same or similar configuration.
"builders": [
{
"type": "amazon-ebs",
"region": "{{user `aws_region`}}",
"source_ami_filter": {
"filters": {
"virtualization-type": "hvm",
"architecture": "x86_64",
"name": "ubuntu/images/hvm-ssd/ubuntu-bionic-18.04-amd64-server-*",
"block-device-mapping.volume-type": "gp2",
"root-device-type": "ebs"
},
"owners": [
"amazon"
],
"most_recent": true
},
"instance_type": "{{user `instance_type` }}",
"ssh_username": "ubuntu",
"ami_name": "{{user `ami_name`}}",
"ami_users": "{{user `shared_account_ids`}}",
"vpc_id": "{{user `vpc_id`}}",
"subnet_id": "{{user `subnet_id`}}",
"tags": {
"Name": "ami-{{user `app_name` }}-{{user `build_number` }}",
"app-version": "1.0.0",
"app-environment": "Dev",
"platform": "{{user `platform` }}",
"instance-type": "{{user `instance_type` }}"
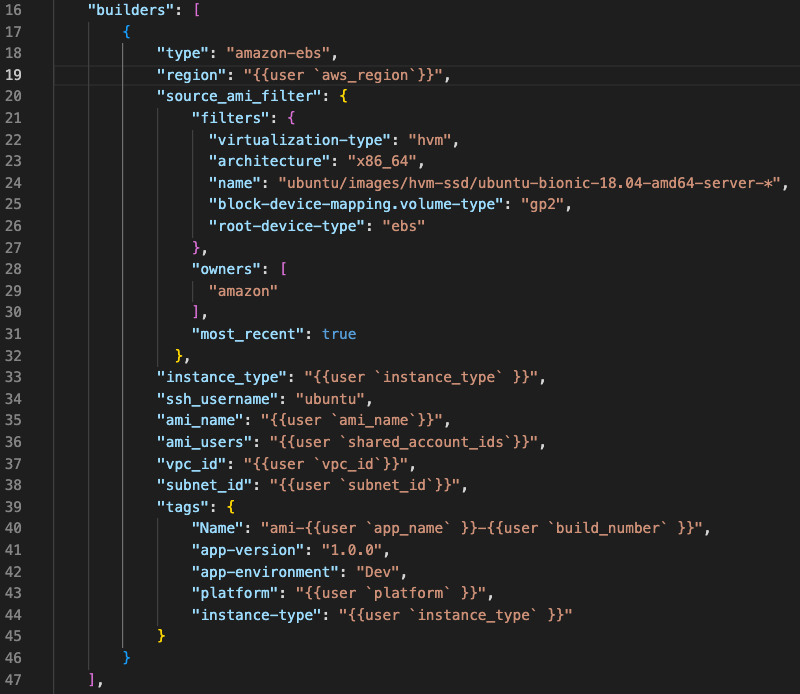
This is the Amazon EC2 AMI builder that ships with Packer. We are building an EBS-backed AMI by launching a source AMI, provisioning on top of that, and re-packaging it into a new AMI.
Provisioners
The provisioner is where we prepare the system for use, in this case specifically, we are going to install the AWS CLI, SSM agent, and CloudWatch agent. We will do this through the use of a shell script named bootstrap.sh (this can be named anything, the name is just semantics).
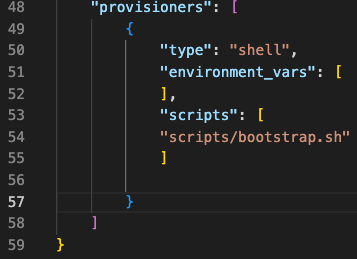
The provisioners block is pretty straight forward and just directs your script to your shell script.
"provisioners": [
{
"type": "shell",
"environment_vars": [
],
"scripts": [
"scripts/bootstrap.sh"
]
}
]
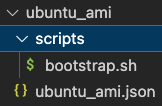
Before we get into the details of the bootstrap.sh script, let’s make sure your file directory is set up properly. First you will want to create a folder that has the above json script in it, folder = ubuntu_ami, script = ubuntu_ami.json. You will need an additional a folder within the main folder that is named scripts. This is where you will store the shell script(bootstrap.sh).
bootstrap.sh
This script runs through the install commands of updating the package to the latest version, installing Python, AWS CLI, SSM-agent, and CloudWatch agent.
#!/bin/bash -xe
sudo apt -y update
sudo apt install python3 -y
sudo apt install python3-pip -y
sudo apt install awscli -y
aws --version #run to check that it worked
# install ssm-agent
sudo apt install snapd
sudo snap install amazon-ssm-agent --classic
sudo snap start amazon-ssm-agent
echo "amazon-ssm-agent installed"
# install CW-agent
echo "starting CW agent"
wget https://s3.amazonaws.com/amazoncloudwatch-agent/ubuntu/amd64/latest/amazon-cloudwatch-agent.deb -P /tmp/
cd /tmp
sudo dpkg -i -E ./amazon-cloudwatch-agent.deb
sudo /opt/aws/amazon-cloudwatch-agent/bin/amazon-cloudwatch-agent-ctl -a fetch-config -m ec2 -s -c default
echo "checking CW agent status"
sudo systemctl status amazon-cloudwatch-agent
sudo systemctl stop amazon-cloudwatch-agent
echo "done ubuntu "
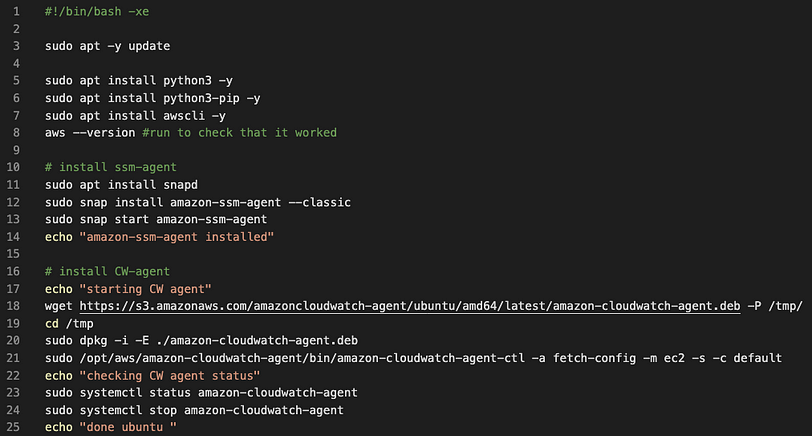
Creating the bootstrap script caused me the most problems. Most of the commands were found by a simple internet search, however, I struggled with installing CloudWatch in particular. I used this documentation to download and install the CloudWatch agent. However, I was encountering errors when I went to run my script. I then discovered that, like the SSM-agent, I needed to start my CloudWatch agent. A google search took me to this documentation.

I’m ashamed to say that I quickly did the whole copy/paste song and dance, and didn’t take the time to read the documentation above. I copied and pasted the above script in my command and ran it. The problem was that I DIDN’T save the config file to my local computer, so I didn’t need to enter a path. I did some more research and realized, I could just replace configuration-file-path with ‘default’ (which is displayed in my script above). That worked perfectly, my script ran and my custom AMI was created.
How to Run your Script
I mentioned above I was able to run my script and create the AMI, but how? Since we are using Packer this is achieved by using Packer commands.
First, make sure you are in the correct directory (you may need to change directories, recall the command: cd ubuntu_ami). Next we will run the packer build command, in this instance my file is called ubuntu_ami.json, you will need to use your file name.
packer build <file_name>

It took my AMI 6 minutes and 31 seconds to build. You can follow the progress in the CLI or in the console. In the console, you should see an EC2 instance launch, shortly after your image should appear in the list of images, then you will see the instance stop/terminate.

Congrats, you have created your custom AMI image!


